HS402-WiFi User Manual
First configuration
At the first boot the HS402-WIFI oscilloscope creates an Wifi access point with SSID like HS402-F62684. Connect to it with the phone or PC (password: 123456789) and open the browser (everything except Internet Explorer) at address 192.168.4.1, to access the oscilloscope configurations.
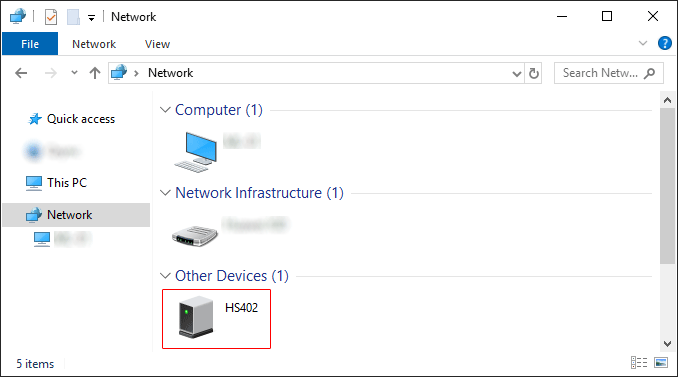
In windows you can find it also under Network. Double click on the icon to open the configuration page.
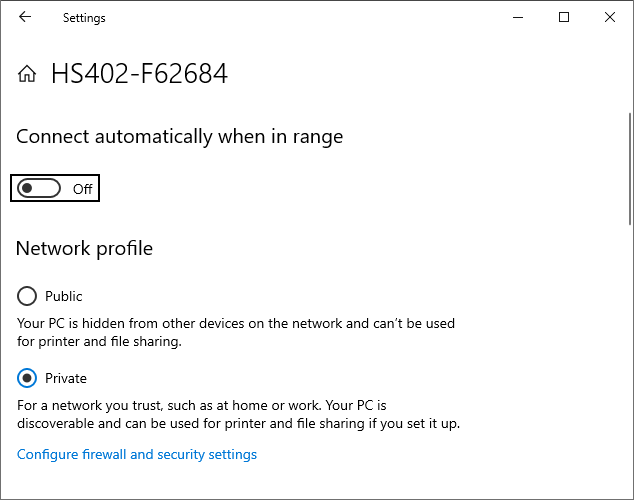
In case you cannot see the oscilloscope in the Network list, in the wifi list just open the preferences of the HS402 wifi and set it as Private since Windows block the device discovery on public networks.
Oscilloscope Configurations
Network
The oscilloscope can work in one of these modes:
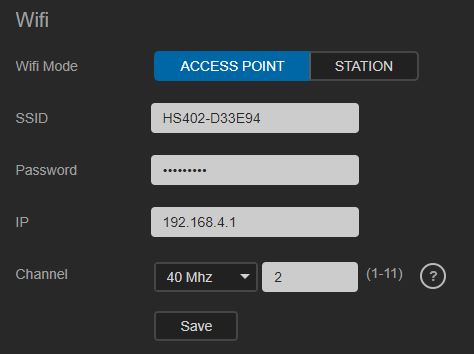
Access Point (or AP): the oscilloscope become an access point and the phone can connect to it directly by using its SSID name (for example HS402-F62684). You can configure SSID name, password, IP and WiFi channel. 40Mhz WiFi channel is faster and generally suggested. For the WiFi channel selection it is suggested to run a WiFi scanner to check which channel is more free in your area.
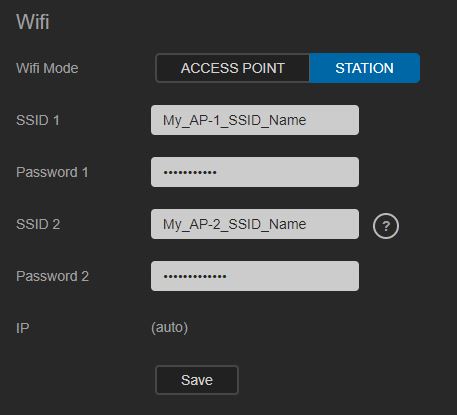
Station (or STA): the oscilloscope connect to an existing access point (for example a residential one) and can be found by HScope in the same network.
You can set 2 different SSID, the oscilloscope will try to connect to the first one, in case of failure it will try the second one, in case not possible the oscilloscope will turn to be Access Point using the access point settings.
Remember to reboot the ESP32 (or press the reset button) to apply the new WiFi settings.
LED Messages
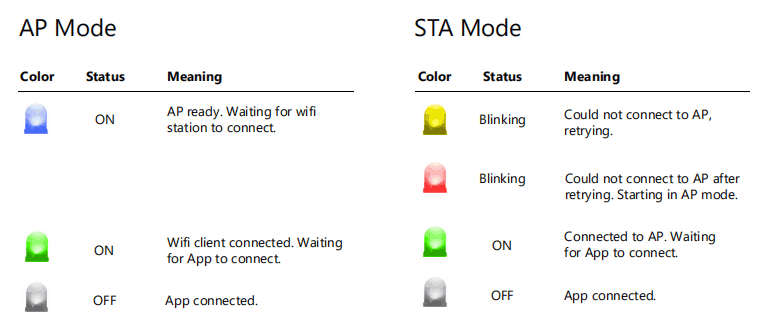
The RGB led connected to the ESP32 development board provides the status of the oscilloscope.
AP Mode: the ESP32 is itself an access point, you can connect to it directly by searching on the available Wi-Fi. SSID like HS402-F62684.
STA Mode (Station Mode): the ESP32 connect to an existing access point / router. The phone / tablet should be connected to the same network to connect to the oscilloscope. You can configure this mode in the ESP32 Webpage.
HScope Configuration
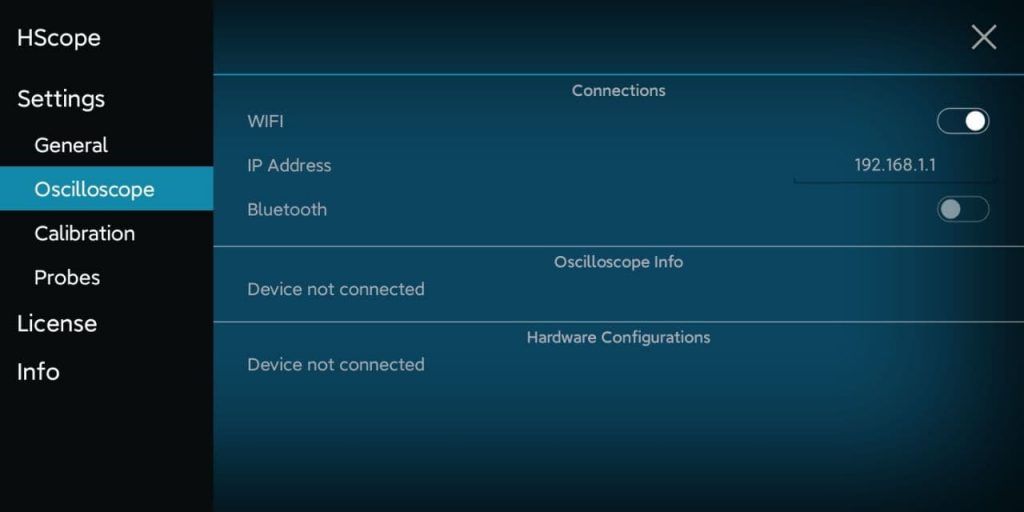
In HScope you need to enable the WiFi connection. This setting in available in the Oscilloscope section:
Configuration Reset
In case you forgot the password of the Wifi in AP mode and cannot access the configuration anymore, just press the BOOT button to reset the configuration to the standard values.
- Press and keep pressed the
BOOTbutton for at least 3 seconds. The LED will blink in yellow color. - Release the button, then the LED will blink in red color to indicate the configuration update and the ESP32 will restart automatically in AP mode with the default SSID name and password.
Possible Issues
The app disconnect from the oscilloscope after a while
This may be due to the Android phone/tablet that disable automatically from the ESP32 network and connect to another network. To avoid this you need to disable in the Android settings the automatic connection to stronger networks.
Remove WiFi automatic connection to strong network in Android. In this way the oscilloscope won’t disconnect if the Android tablet detect a stronger WiFi connection.
The app disconnect and reconnect
This case has been found from some user and it is related to the fact that the phone/tablet run other processes using the networking and slowing down the connection with the oscilloscope which goes in timeout and then reconnect. This has been solved by deactivating the Bluetooth in the Android tablet/phone (enabled Bluetooth used to run frequent scans blocking the WiFi communication).
